14 December 2012

The Thing moves!

Good evening everyone!

Today is a big day. A truly great day. Its the day when I wired the printer, turned it on, loaded the software and managed to move it! Even better- I did not burn anything!

OK, enough self-applause, back to the facts. I managed to repair the broken path on the PCB board. Note to self- never use cheap solder that you get in supermarket for 1 euro. Well, maybe it is a good solder, but it requires higher temperature to work with. Such power is not provided by my simple 15W iron. In effect, I made the whole area around the "break" dirty with solder. Fortunately managed to clean the short-bridges, and everything works fine. Here is the picture of the repaired board:


Before we move forward, I have to admit that there were some sparks when I tried to measure the voltage on endstops. But it happened only once and were only my clumsy hands making short circuit :P I also had to redo the cables to endstops (signal and voltage were mixed).

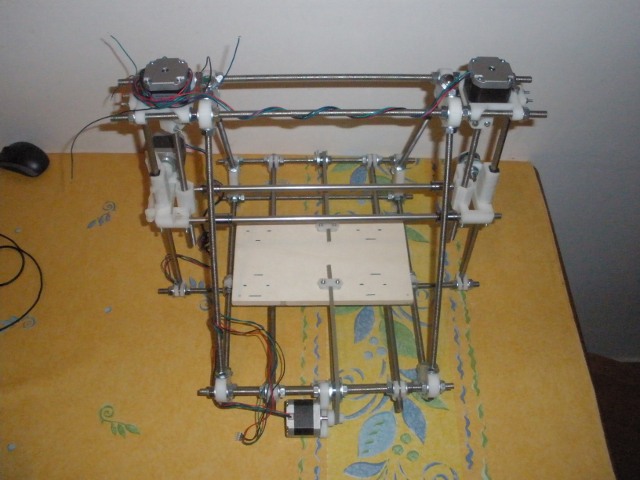
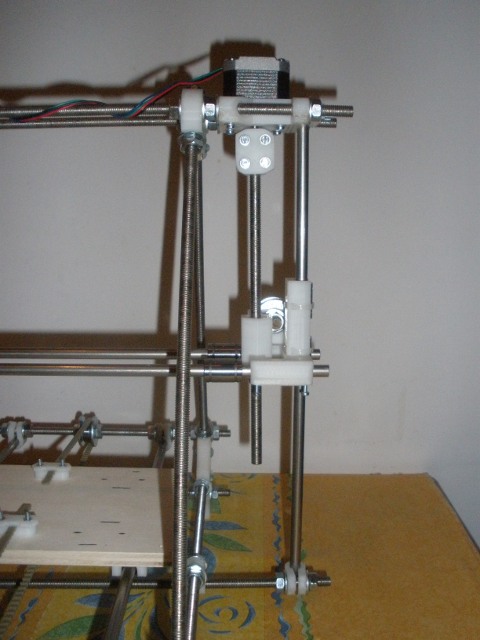
And now, for the pictures of the mounted RepRap that I promised last time (but was to lazy to post).

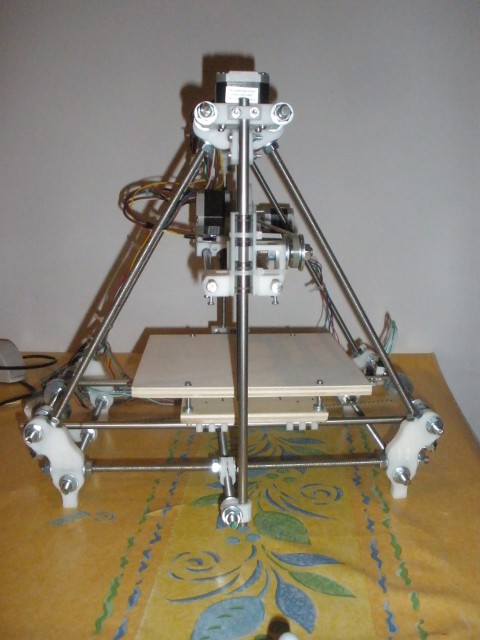


And FINALLY! The fully mounted, fully wired printer! Of course it still needs calibration and minor fixes, but it moves and heats and measures temperature and reads endstops! It appears that I made the wiring on the "left side" since I had to switch rotation directions for all engines using software. But it works. Second note to self- having experience with wrong wiring of endstops, check the wires of the engines...


Hope you liked this little show off ;) See you next time, when hopefully I will describe how the X and Z jamming were fixed. Also maybe we will put some plastic into the hot-end :) And most of all, I will try to make a movie with the printer working! Hold your thumbs! Ciao! :D

10 December 2012

Its "built", still far from "done"

Hello again!

Time is running out, there are just 15 days till the end of the world, and most importantly 21 days till the end of the year! And I have told so many people that the printer will be working by that time, that I will feel really stupid if it does not :P

Now for the news.

I built it.
The printer I mean.
Its done.
I mean...

...everything is mounted, wired, etc. Ready for plugging in. In fact I did try it out yesterday. The electronics fried :D Here is how it was: I plugged the wires to the endstops, hot-end and termistor, not to the engines (was afraid). Wanted to test one thing at a time. That was a good call, since the circuit path delivering power to the endstops fried, vaporised, burned, you get the picture. Hopefully it was just not "big" enough to sustain given current load, and that there are no short circuits on the board.
The good news is that the board communicates with my PC, loads the programs and seems to be cooperating.
Now it is "just" to repair the board, calibrate the printer, install newer Ubuntu (I am mad as hell for that. The so called Pronterface python script for easy use of the printer works only for Ubuntu 10.10 and higher. I love my 10.04...) and probably looots of lesser tweaks. That's the fun ;)

There will be no photos right now, deal with it. Yes, yes I know "pics or didn't happen"- well, maybe today evening.

Have a nice snowy day :)

13 November 2012

Late news

Greetings Internet!

Today I am sick, and finally found a minute to write this post.
I can proudly say, that my RepRap is getting very close to being finished.
Most of the printer is already assembled. The remaining parts ale half finished.
Unfortunately in the last weeks, and for sure in the following ones I will not push the project further... It would be fun to change a hobby into an everyday work ;) but for the moment I have "real" tasks that need my attention.

In addition to that, I am waiting for the TTL-USB converter piece that is traveling from the US. It has been doing that for the last 1,5 week, ehh conventional mail. Without it, I can not connect the printer to the computer- thous, can not start the finishing touches and calibrations.

Anyway, here are some pictures from like 2 weeks ago. I have had not moved further from that point- pity...


As it can be seen, the Y and Z axis are already assembled, so is the X motor. The carriage is waiting for finishing of the extruder. I have to prepare a bolt with teeth that will push the plastic into the hot-end. Again, loaded time blocks the progress. After the bolt is done, it will be just to put several screws, clip the carriage to the bearings on the X axis, put the X motor belt, wire everything and we can start printing! Hope this will happen till first half of December :P

Aside from work related issues, I am being held back by more hardware related events. The major one was breaking of my computer. Unless I manage to fix that bugger, the first prints will be guided by my wifes laptop. Not that she has something against it, but still... you now ;)
For that reason I began wondering about purchasing and incorporating a Raspberry PI mini computer. I know people are using them with success to guide 3D printers, and it would be cool to join that trend.
At the same time, I also started to get the feeling that I am over the budget for this project. Yes yes, there was no budget, but I roughly knew how much I wanted to spend to make a Reprap. And even thought Raspberry PI is only like 35$, it is another not essential "gadget" that will drive the costs even more: mouse, keyboard, a monitor (I do not have one- only laptops, not even a TV), possibly a VGA-HDMI converter, USB hub... The prices start to add up fast. For that reason, I think I will hold with Raspberry PI till I finish the printer, and start printing. With some luck, I will initiate this "sub-project" early next year (if we survive 23rd December Muahahaha-doom-doom-dumb-dumb!).

Well, basically thats the state of the art for today. Hold your thumbs, and wish me luck with normal day work, so I can get back to that what is fun- the RepRap :) See you!

25 October 2012

Its alive!

Hello folks!

As I mentioned previously, I had an element to fix on the circuit board. Well, I replaced it, checked the thing 2 more times, plugged the board to the power, and... IT WORKS! :D
I measured all possible voltages in the slots, etc, all is at the desired levels!
Now, its "just" to make the rest of the printer, put it ll together and- we start printing!

Other news, also yesterday I attended a very nice seminar/demonstration of 3D printing at the local science center. For the first time I could see live the process of printing. The guys had a Makerbot Replicator www.makerbot.com, and made in Poland CB-printer cb-printer.com (solid metal construction based on Prusa Mendels).

And the last thing- I ordered a TTL to USB converter from US. Total cost with transport was around 15euro. I add that to the post with the summry.

See you next time!

23 October 2012

Humble me

Greetings wondering souls,

first things first,
I have to admit I was wrong, and the power source is working fine. After going to the shop, the guys easily demonstrated how little I know about PC elements ;)

Knowing that, today after work I tried to plug in the board.

First, I plugged the proper jumper, then connected switched off power supply, turned the power on and... (!) There are several indicators described in the instruction that the board is OK.
First one is "there is no smoke".
Well, we did not pass that one :D
The L1 part that is 100uH coil burned.
Funny enough the second indicator was fulfilled ("the yellow diode is on"). At least for the moment before I turned the power off ;)

Lesson learned:
Before putting your home made circuit under voltage, check each and every connection. I found one not soldered pin and one solder bridge what should not be there (sic!). Hope that were the only things wrong.

Tomorrow I will purchase a replacement coil (or two for safety measure), put it in place of the broken one and cross my fingers that no other elements were effected.
And then I will check the connections for the fifth time.
And only then will I plug the power on ;)

Hold your thumbs!

20 October 2012

Have to speed things up...


Hello again!

Like the last time, a lot of time passed since previous post... What can I do? How can I explain? And most important- should I care? ;)
Unfortunately there are distractions that appear from the blue, strike you like a lightning and then eat up the remaining small pieces of evenings that you have left for yourself- thank you X-Com and Civilisation :P Worst- there are more to come! Fear the almighty StarCraft Expansion! 
Fortunately my poor laptop can not handle top-notch graphics, and I drop most other "hot" titles (will play Diablo III when I get a machine that does not work with a game only on low-low-low settings...).
To calm you down, I care at least to the point that I told several people that the printer will be working by the end of this year- that includes you. I considered it a reasonable time restriction and want to stick with it. And most importantly- I am a man of my word- its also a safety feature against "The Distractors".

Enough of mumbling- to the pictures and joyful progress!

I finished the electronic board to the point where I have to check the voltages before inserting semiconductors and chipset. First "general soldering overview", then "the top of the board", and "my silly soldering skills" ;) Enjoy!


Since I am a total soldering noob, I found the following quite funny and a bit disturbing. From the last soldering session I observed that something happened to the tip of the iron. In the beginning it was like a tip of a normal screwdriver. After all this soldering I have done- take a look:


I guess that the solder itself, and the cover of a PCB board have some acids etc, that are supposed to "melt" the metals in order to make better bonds. I guess they also work on the iron ;) And other thing- look how much solder I used! :D It was full when I started! I never used a full solder pack. Awesome! (yes, I enjoy strange kind of things) 

Unfortunately I could not check if my work is good or bad. The power supply I bought at the local "electronics repair point" does not work. Or I am being stupid. But since its humans nature to presume that our brain is superior to others, I will have to go to the shop and make a racket (for those offended- I am joking with "the brain" stuff- jeez, relax a bit, read some comics, watch cartoons- it helps to understand this kind of humour :P ).

Finishing, I have to boast a bit and say that my lovely wife got me a great present for "boys day"- a brand new Proxxon power tool for precise drilling, cutting, grinding, polishing- all this cool and useful stuff :D Love you Honey!

Thats it for this post. Since I managed to gather lots of tools, I guess the next one will have to do something with the printer itself. Be patient and wait!

Signing off for now...

30 September 2012

I am still here- progress report ;)

Hello Folks!

Its been 3 weeks and a day since my last post. What can I say? "Real" jobs require more attention than a hobby.

But there was some progress and I want to share it with you!

First- the main frame is ready!
Thanks to Giuliano from Energy Automation who allowed me to use their workshop (flex cutter),  I was able to cut the threaded rods in a more humane and modern way.
A bit later I also discovered my lack of experience.
In order to hold the threaded rods in place while cutting, I used a vise. Everything would be cool should I protected the threads while squeezing them. I did not exaggerate with the force, but it was enough to damage the threads... During the construction I had to use a lot (I mean a LOT) of force to put the screws on those rods. Fortunately the 2 Z-axis rods were not damaged at all, and I will be able to use them.
TIP: while holding a threaded rod with a vise make sure to put something soft in between. A piece of cloth will do. This will prevent the rod from moving and will not damage the threads.

Enough of that, I am sure you are curious of the effects :) Here is the frame:


Forgive the mess on the table. We are working, aren't we? :)

Right now the frame is waiting till I make the flats on the shafts of the motors.
It is also not tight screwed. It will be done after I cut the bottom moving board.

The frame was done some time ago. In the meantime (during last week), I managed to find 2 hours to relax and solder a little bit.

First I soldered the multi-pins to Pololu motor drivers.

TIP: when you enter the pins into the holes, they move a lot back and forth. To prevent them from doing so, you can use the slots to hold them in place. Pic below show how I did it.


And here are the 4 Pololu drivers in full glory :)


Next, I moved to mount the main board. Some may think- "this is sooo difficult", "wow, you need to be very skilled to do that", "its requires tremendous knowledge". That is not true. You just need a bit manual skills and not to do drugs that make your hands shiver too much (other drugs also suck- don't do drugs ;) ). Youtube have tons of "how to solders", for beginners, and pros. Of course some practice earlier would not hurt (lucky me, but should have done more soldering in the past). Finally, the manual at RepRap.org prepared by Traumflug is just awesome.

The work itself for me is great. You have a purpose, calmly focus on one, rather simple job, clear your mind and enjoy yourself :) I love soldering! Here is the result of the first "session":


Some time later I found time for a second "date with a soldering iron" :) Overall I think I did a good job. The only thing I screwed a little bit up, was the 4-pin slot on the very right. It was leaning a bit (did not put it perfectly straight). While I was trying to fix it, I slid the two right pins inside, instead of bending the left ones. It was just an aesthetic thing, so I left it like this (its even hard to see it anyway).
I also put some super-glue in one of the holes in the left 4-pin slot. That was stupid. Fortunately I cleaned it fine with some metal piece and deoxidizer.
Here is the result if second session:


That is it for now.
Again I have a lot of stuff to do at work, also have packed two weekends, so can not tell when I will be able to put some content. Hope quite soon. Till next time! :)